|
Win10专业版系统电脑用户在使用操作电脑系统时,碰到电脑窗口无法移动使用起来很是麻烦,那么Win10专业版系统电脑窗口无法移动怎么办?其实解决方法非常简单,还不知道的朋友跟着系统之家小编一起学习一下Win10专业版系统电脑窗口无法移动解决方法。
解决方法如下
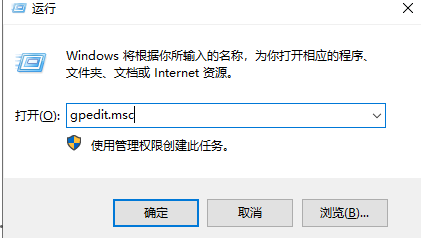
1、按下【win】【r】键打开运行,输入【gpedit.msc】,点击【确定】。
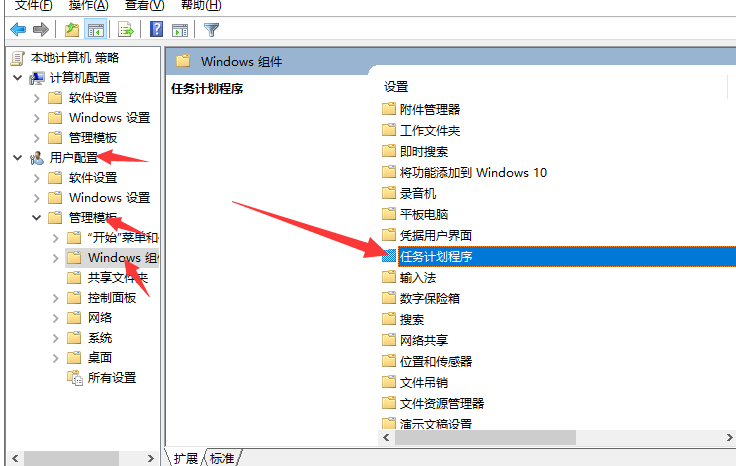
2、依次点击【用户配置】【管理模板】【Windows组件】,然后在右侧找到【任务计划程序】。
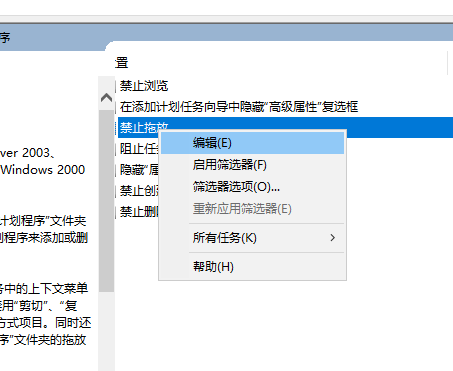
3、双击【打开】,看到【禁止拖放】选项,右击选择【编辑】。
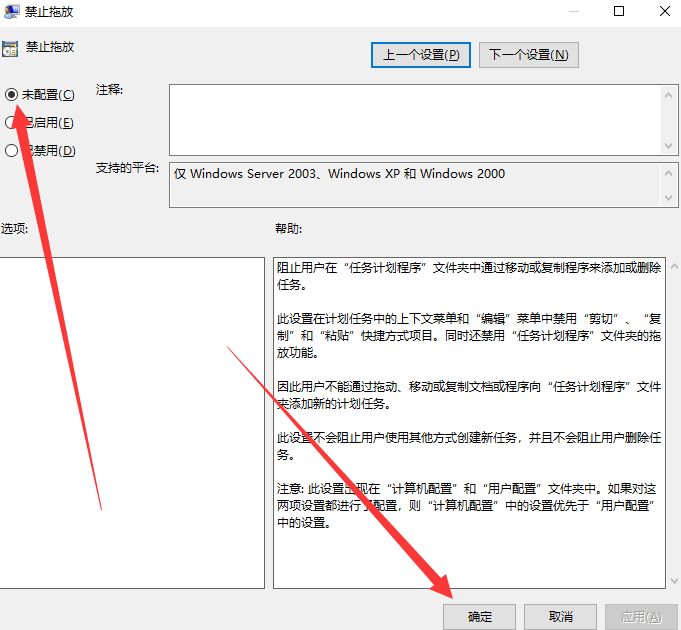
4、点击【未配置】,然后点击【确定】即可。
 |