|
在我们的Win10专业版系统中,环境变量起着非常重要的作用。它是用来指定操作系统运行环境的一些参数。不过很多小白用户还不知道环境变量的设置是在哪里。下面就给大家详细介绍一下Win10专业版是如何设置环境变量的。
Win10专业版设置环境变量的方法:
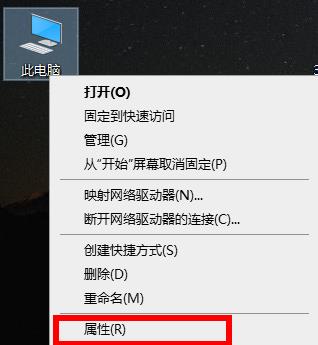
1、右击桌面的此电脑,点击“属性”。
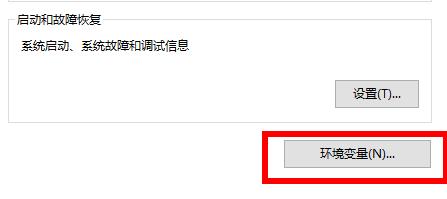
2、随后点击左侧的“高级系统设置”。

3、再点击下方的“环境变量”。
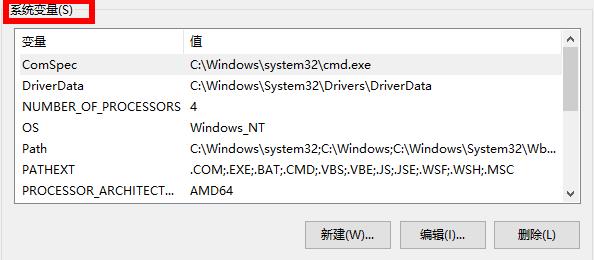
4、点击系统变量,即可进行新增、编辑、删除等一系列操作。
以上就是Win10专业版设置环境变量的方法了,系统之家还有更多关于Win10系统的内容噢~ |